

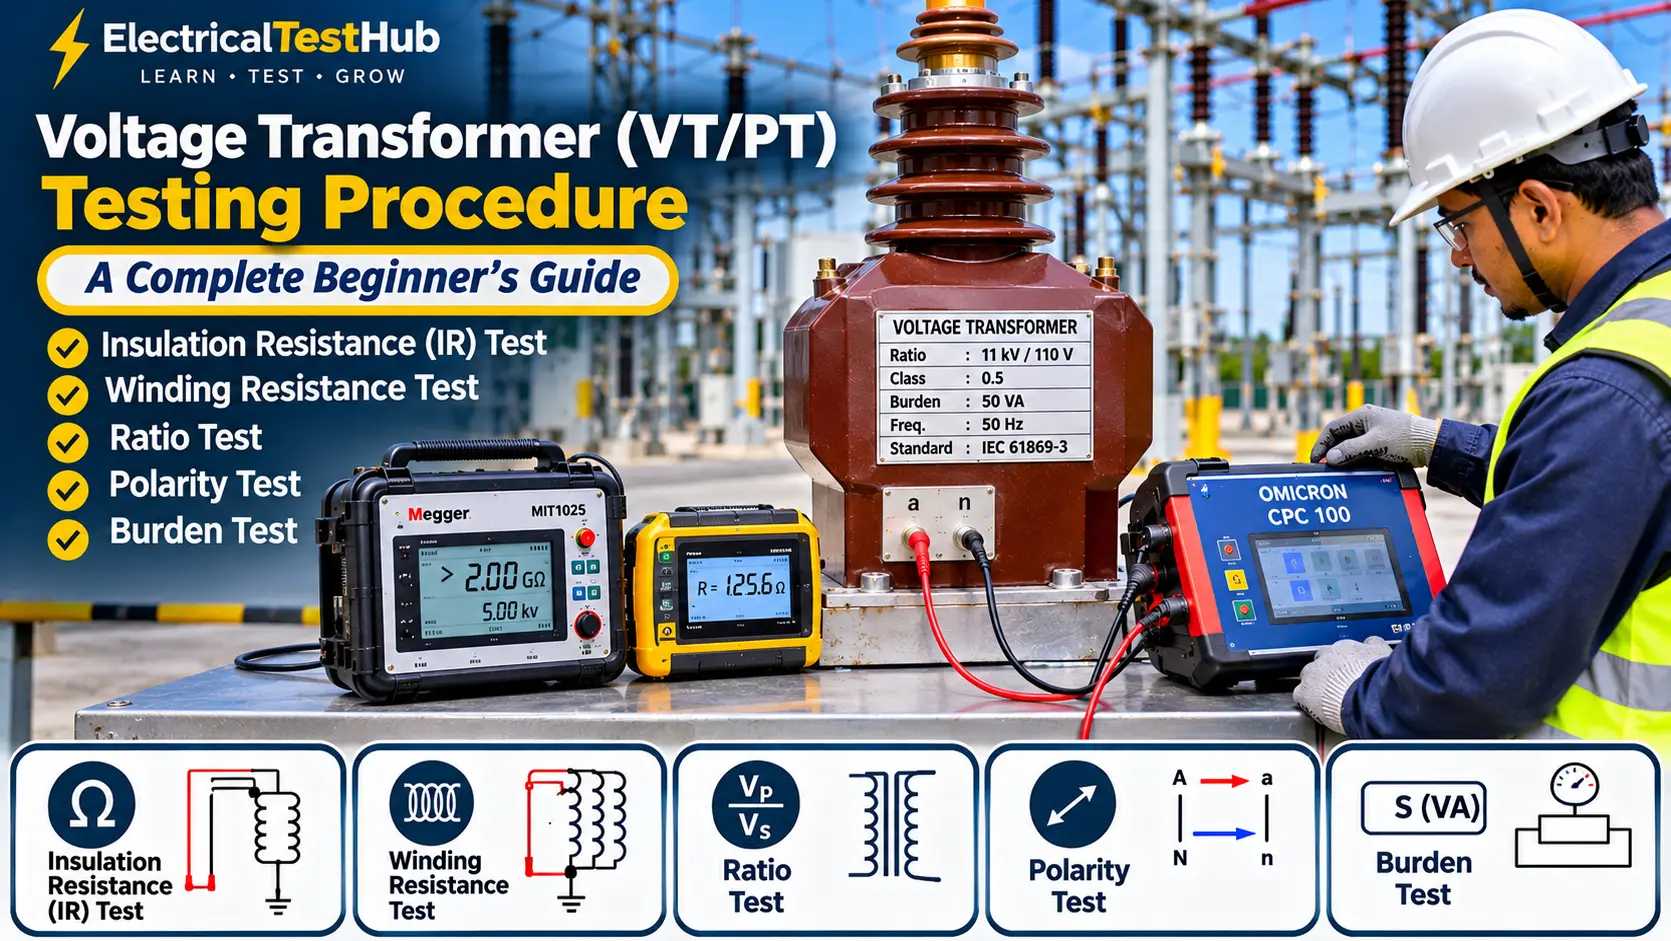
SEO Title:
Focus Keyword: Voltage Transformer Testing Procedure
Secondary Keywords: VT Testing Procedure, PT Testing, Voltage Transformer Insulation Resistance Test, VT Winding Resistance Test, VT Ratio Test, VT Polarity Test, VT Burden Test, Potential Transformer Testing
Meta Description: Learn voltage transformer testing procedures step by step. Understand VT insulation resistance, winding resistance, ratio, polarity and burden tests with simple explanations.
Permalink: //
Category: Transformer Testing
Introduction
A Voltage Transformer (VT), also known as a Potential Transformer (PT), is an important instrument transformer used in electrical power systems.
Its main function is to reduce high system voltage to a lower, standardized voltage that can be safely measured by meters, protection relays and monitoring equipment.
For example, a voltage transformer with a ratio of 11,000/110 V reduces an 11 kV primary voltage to approximately 110 V at its secondary terminals under rated operating conditions.
Voltage transformers are commonly used in:
- Electrical substations
- Medium-voltage switchgear panels
- High-voltage substations
- Protection and metering panels
- Generator protection systems
- Energy metering systems
- Synchronization and voltage monitoring circuits
But how do we confirm that a voltage transformer is operating correctly?
This is where VT testing becomes important.
VT testing helps engineers verify insulation condition, winding resistance, transformation ratio, polarity and secondary burden.
In this beginner-friendly guide, we will explain five important voltage transformer tests:
- Insulation Resistance (IR) Test
- Winding Resistance Test
- Voltage Ratio Test
- Polarity Test
- Burden Test
We will also discuss testing equipment, basic connection diagrams, step-by-step procedures and result interpretation.
Scope note: This guide mainly covers conventional electromagnetic inductive voltage transformers. Capacitive Voltage Transformers (CVTs) require additional specialized tests and procedures.
1. Understanding Voltage Transformer Nameplate Details
Before starting any VT test, the first step is to check the nameplate.
The nameplate provides important information about the VT’s electrical characteristics and application.
Example VT Nameplate
| Parameter | Example |
|---|---|
| Equipment | Voltage Transformer |
| Primary Voltage | 11,000 V |
| Secondary Voltage | 110 V |
| Frequency | 50 Hz |
| Phase | Single Phase |
| Accuracy Class | 0.5 |
| Rated Burden | 50 VA |
| Insulation Level | According to nameplate |
| Standard | IEC 61869-3 |
Let’s understand the important details.
Primary Voltage: The rated voltage applied to the primary winding. In this example, it is 11 kV.
Secondary Voltage: The rated output voltage. Here it is 110 V.
Accuracy Class: Indicates the measurement accuracy under specified operating conditions.
Rated Burden: The specified load that can be connected to the VT secondary while maintaining its rated performance.
Frequency: The rated operating frequency, commonly 50 Hz in Bangladesh.
Understanding VT Terminals
Common terminal markings include:
| Winding | Terminal Markings |
|---|---|
| Primary | A and N, or H1 and H2 |
| Secondary | a and n, or X1 and X2 |
Actual terminal markings depend on the manufacturer and VT design. Always follow the nameplate and connection diagram.
2. Voltage Transformer Testing Equipment
Different instruments are required for different VT tests.
[IMAGE PLACEHOLDER: Insert a photograph showing OMICRON CPC 100, Megger MIT1025, winding resistance tester, TTR tester and digital multimeter.]
| Testing Equipment | Application |
|---|---|
| Insulation Resistance Tester | VT IR test |
| Winding Resistance Tester | VT winding resistance |
| Transformer Turns Ratio Tester | Ratio and phase relationship |
| OMICRON CPC 100 | Multiple VT electrical tests with suitable accessories |
| Digital Multimeter | Voltage and continuity checks |
| Burden Test Equipment | Secondary burden measurement |
| Primary Voltage Source | Controlled ratio and functional testing |
Popular Manufacturer Equipment
OMICRON CPC 100: A multifunctional electrical testing system that supports various instrument transformer tests with suitable accessories.
Official reference: https://www.omicronenergy.com/en/products/cpc-100/
Megger: Provides insulation resistance and other electrical testing equipment.
Official website: https://www.megger.com/
Fluke: Provides digital multimeters for supporting electrical measurements.
Official website: https://www.fluke.com/
Always select the instrument based on the VT rating, test method and manufacturer’s instructions.
3. Step-by-Step Voltage Transformer Testing Procedure
Test 1: Voltage Transformer Insulation Resistance (IR) Test
What is the IR Test?
The Insulation Resistance test checks the condition of insulation between the VT primary winding, secondary winding and earth.
It helps identify possible insulation problems such as:
- Moisture
- Contamination
- Insulation deterioration
- Damaged winding insulation
- Leakage paths to earth
Required Equipment
- Insulation Resistance Tester
- Suitable test leads
- Discharge and earthing equipment
- Digital multimeter, if required
Common IR Test Combinations
For a single-phase electromagnetic VT, the common test combinations are:
- Primary winding to Earth
- Secondary winding to Earth
- Primary winding to Secondary winding
Basic Connection Diagram
       VOLTAGE TRANSFORMER IR TEST

             PRIMARY
          A -------- N
          |          |
          +----------+
                |
           [ VT CORE ]
                |
          +----------+
          |          |
          a -------- n
             SECONDARY

       Test 1: Primary to Earth
       Test 2: Secondary to Earth
       Test 3: Primary to Secondary
The diagram illustrates the test combinations, not the detailed instrument lead arrangement. Connect all winding terminals and earth points according to the approved test procedure.
Step-by-Step IR Testing Procedure
Step 1: Identify the VT
Check the nameplate, primary terminals, secondary terminals and winding configuration.
Step 2: Isolate the VT
Disconnect the VT from the power system and ensure that all possible sources are isolated.
Step 3: Apply LOTO
Follow the approved Lockout/Tagout procedure and verify the absence of voltage.
Step 4: Disconnect secondary equipment
Disconnect meters, protection relays, fuses and other sensitive electronic equipment where required by the test procedure.
Step 5: Prepare the test connections
Arrange the primary and secondary winding terminals according to the selected test combination.
Step 6: Select the test voltage
Select an appropriate DC test voltage based on the VT insulation design, rated voltage, manufacturer’s recommendation and approved procedure.
Do not automatically use the same test voltage for every VT.
Step 7: Perform the test
Apply the selected voltage for the specified duration and record the insulation resistance.
Step 8: Repeat the test
Perform the remaining primary-earth, secondary-earth and primary-secondary tests as required.
Step 9: Discharge the winding
After each measurement, discharge and earth the tested winding using the approved instrument procedure.
Example IR Test Result
| Test Combination | Test Voltage | IR Reading |
|---|---|---|
| Primary to Earth | 5 kV DC | 2500 MΩ |
| Secondary to Earth | 500 V DC | 1800 MΩ |
| Primary to Secondary | 5 kV DC | 3200 MΩ |
These readings are illustrative only. The appropriate test voltage and acceptance criteria depend on the VT design and manufacturer’s instructions.
How to Evaluate IR Results?
Consider:
- Previous test results
- Factory test report
- Ambient temperature
- Humidity
- VT insulation design
- Manufacturer’s recommendations
- Applicable project requirements
A low IR value should be investigated before making a final decision.
Important: Do not apply a megger test voltage to connected relays, meters, electronic devices or other equipment unless they are specifically rated for that test.
Test 2: Voltage Transformer Winding Resistance Test
What is Winding Resistance Testing?
The winding resistance test measures the DC resistance of the VT primary and secondary windings.
It helps identify:
- Loose winding connections
- Poor terminal connections
- Open winding circuits
- Damaged winding conductors
- Abnormal resistance differences between similar units
Required Equipment
- Winding Resistance Tester
- Micro-Ohmmeter, where appropriate
- Four-wire Kelvin test leads
- Temperature measuring instrument
Basic Connection Diagram
       VT WINDING RESISTANCE TEST

           PRIMARY WINDING

              A -------- N
              |          |
              +-- [ VT ]-+

           SECONDARY WINDING

              a -------- n
              |          |
              +-- [ VT ]-+

       Test 1: A to N
       Test 2: a to n
The instrument should be connected directly across the winding being measured, following the manufacturer’s four-wire or other specified connection method.
Step-by-Step Winding Resistance Procedure
Step 1: Ensure the VT is completely isolated and safely discharged.
Step 2: Identify the primary and secondary winding terminals.
Step 3: Disconnect external connections as required by the approved test procedure.
Step 4: Connect the winding resistance tester to the primary winding terminals.
Step 5: Select a suitable test current according to the winding rating and instrument instructions.
Step 6: Start the test and allow the reading to stabilize.
Step 7: Record the primary winding resistance.
Step 8: Repeat the procedure for the secondary winding.
Step 9: If the VT has multiple secondary windings, test each winding separately as applicable.
Step 10: Allow the instrument to discharge the winding before disconnecting the test leads.
Example Winding Resistance Result
| Winding | Measured Resistance |
|---|---|
| Primary | 125.5 Ω |
| Secondary 1 | 0.85 Ω |
| Secondary 2 | 1.12 Ω |
These values are illustrative only. Actual resistance depends on the VT design and winding construction.
How to Evaluate Winding Resistance?
Compare the measurements with:
- Factory test results
- Previous maintenance results
- Similar phases or units
- Manufacturer’s specifications
- Temperature-corrected values, where applicable
A significant difference may indicate an abnormal winding or connection condition.
Important: Primary and secondary winding resistances are not expected to be equal. Compare each winding with its own reference values rather than comparing primary resistance directly with secondary resistance.
Test 3: Voltage Transformer Ratio Test
What is a VT Ratio Test?
The ratio test verifies the relationship between the primary and secondary voltages.
For example, a VT with a ratio of 11,000/110 V should produce approximately 110 V at its secondary when 11,000 V is applied to the primary under rated operating conditions.
VT Ratio Formula
[
VT\ Ratio=\frac{Primary\ Voltage}{Secondary\ Voltage}
]
Example Calculation
Suppose:
- Primary voltage = 11,000 V
- Secondary voltage = 110 V
[
VT\ Ratio=\frac{11000}{110}
]
[
VT\ Ratio=100
]
Therefore, the VT ratio is 100:1.
Required Equipment
- Suitable VT Ratio Tester
- OMICRON CPC 100 with appropriate accessories
- Controlled AC voltage source
- Digital Multimeter
- Suitable measuring leads
Basic Ratio Test Connection
          VT RATIO TEST

        Controlled AC Supply
                 |
                 |
             A ------- N
                [ VT ]
             a ------- n
                 |
                 |
          Secondary Voltage
              Measurement
This is a simplified diagram. The applied voltage must be suitable for the VT and the selected test method.
Step-by-Step Ratio Testing Procedure
Step 1: Check the VT nameplate and confirm the rated primary and secondary voltages.
Step 2: Isolate the VT from the power system.
Step 3: Confirm that the secondary circuits are disconnected from connected meters and relays where required.
Step 4: Connect the ratio test instrument according to its manufacturer’s instructions.
Step 5: Enter the rated primary and secondary voltage values.
Step 6: Apply the specified test voltage using the approved ratio test method.
Step 7: Measure the primary and secondary voltage values.
Step 8: Calculate or record the measured ratio.
Step 9: Compare the measured ratio with the nameplate ratio.
Step 10: Repeat the test for each secondary winding and phase as applicable.
Example VT Ratio Test Result
| VT | Nameplate Ratio | Measured Ratio |
|---|---|---|
| R Phase | 100:1 | 100.1:1 |
| Y Phase | 100:1 | 99.9:1 |
| B Phase | 100:1 | 100.0:1 |
These readings are illustrative only.
Ratio Error Calculation
A common ratio error expression is:
[
Ratio\ Error(%)=
\frac{K_n-K_a}{K_a}\times100
]
Where:
- Kn = Nominal transformation ratio
- Ka = Actual transformation ratio
Follow the applicable standard or instrument method for the precise error calculation and sign convention.
Why is the Ratio Test Important?
An incorrect ratio may indicate:
- Winding defects
- Incorrect terminal connections
- Wrong VT configuration
- Incorrect nameplate or installation information
- Measurement connection errors
Important: Do not apply the full rated system voltage to a VT primary during a field test unless the approved test procedure specifically requires it. Use a suitable controlled test source and appropriate safety arrangements.
Test 4: Voltage Transformer Polarity Test
What is VT Polarity?
VT polarity indicates the relative instantaneous voltage relationship between the primary and secondary winding terminals.
Correct polarity is important for:
- Protection relay connections
- Directional protection
- Metering circuits
- Synchronization systems
- Three-phase voltage measurement
- Power and energy measurement
Understanding VT Polarity Markings
Common terminal markings include:
| Primary | Secondary |
|---|---|
| A | a |
| N | n |
| H1 | X1 |
| H2 | X2 |
The manufacturer’s polarity markings indicate the corresponding instantaneous voltage relationship.
Basic AC Polarity Test Connection
          VT POLARITY TEST

       Low Voltage AC Supply
                 |
                 |
             A ------- N
                [ VT ]
             a ------- n
                 |
                 |
          Multimeter / Voltmeter
             as required
A practical low-voltage AC comparison method uses the manufacturer’s terminal markings and measured voltage relationships. More detailed tests may use a suitable ratio tester or vector measurement instrument.
Step-by-Step Polarity Testing Procedure
Step 1: Check the VT nameplate and terminal markings.
Step 2: Isolate the VT from the power system and verify the absence of voltage.
Step 3: Disconnect external secondary equipment where required.
Step 4: Apply a suitable low AC test voltage to the primary winding using an approved test source.
Step 5: Measure the primary and secondary voltages with suitable instruments.
Step 6: Verify the voltage relationship and terminal polarity using the manufacturer’s test method.
Step 7: If the test setup requires comparing voltages between joined primary and secondary reference terminals, follow the exact polarity-test connection diagram supplied by the test instrument or manufacturer.
Step 8: Record the polarity result for each secondary winding.
What Should Be Verified?
- Correct primary and secondary terminal identification.
- Correct relative polarity.
- Correct secondary winding connections.
- Correct phase relationship for the intended protection or metering application.
Why is Polarity Important?
Suppose a VT is connected to a directional protection relay.
If the voltage polarity or phase reference is incorrect, the relay may calculate the wrong phase angle and make an incorrect directional decision.
Therefore, correct polarity is essential for reliable protection and measurement.
Important: Unlike the common CT DC-kick polarity test, do not assume that a battery-and-analog-meter test is the correct method for every VT. Use an approved AC polarity or ratio/vector measurement method suitable for the VT.
Test 5: Voltage Transformer Burden Test
What is VT Burden?
VT burden means the total load connected to the VT secondary winding.
This load may include:
- Protection relays
- Voltmeters
- Energy meters
- Power meters
- Synchronization equipment
- Secondary wiring
- Terminal blocks
- Other connected measuring devices
VT burden is generally expressed in Volt-Amperes (VA).
Why is Burden Testing Important?
If the connected burden exceeds the VT’s rated burden, the VT may not maintain its specified accuracy.
Excessive burden can cause:
- Voltage measurement errors
- Ratio error
- Phase displacement error
- Poor metering accuracy
- Incorrect relay measurements
VT Burden Formula
For a single-phase VT:
[
VA=V_s\times I_s
]
Where:
- VA = Apparent burden
- Vs = Secondary voltage
- Is = Secondary current
Example Calculation
Suppose:
- Rated secondary voltage = 110 V
- Measured secondary current = 0.30 A
Then:
[
VA=110\times0.30
]
[
\boxed{Burden=33\ VA}
]
If the VT nameplate rated burden is 50 VA, the measured apparent burden of 33 VA is below that rating.
This is an illustrative calculation. For an accurate burden assessment, measurement conditions and power factor must also be considered.
Step-by-Step Burden Testing Procedure
Step 1: Identify the VT secondary winding and its rated voltage and burden.
Step 2: Review the connected protection and metering circuits.
Step 3: Ensure the VT is operating under a safe and approved test condition, or use a suitable isolated test arrangement.
Step 4: Connect suitable voltage and current measuring instruments to the secondary circuit.
Step 5: Measure the secondary voltage and current under the specified operating conditions.
Step 6: Determine the apparent burden using the measured voltage and current, or a suitable burden analyzer.
Step 7: Where required, determine the burden power factor and impedance.
Step 8: Compare the measured burden with the VT nameplate rating.
Step 9: Record the measured burden and observations.
Example Burden Test Result
| Parameter | Value |
|---|---|
| VT Rated Secondary Voltage | 110 V |
| VT Rated Burden | 50 VA |
| Measured Secondary Current | 0.30 A |
| Calculated Burden | 33 VA |
These values are illustrative only.
Important Safety Note
A VT secondary must never be short-circuited. Always use a suitable high-impedance voltage measurement method and an approved burden testing arrangement.
Do not disconnect a VT secondary circuit while it is energized unless the approved switching procedure allows it.
4. Understanding the Difference Between the Five VT Tests
| Test | Main Purpose | What Does It Verify? |
|---|---|---|
| Insulation Resistance | Check insulation condition | Primary-secondary and winding-to-earth insulation |
| Winding Resistance | Measure DC resistance | Winding and connection condition |
| Ratio Test | Verify transformation ratio | Primary-to-secondary voltage relationship |
| Polarity Test | Verify terminal polarity | Correct relative voltage relationship |
| Burden Test | Measure connected load | Total secondary load in VA |
Each test provides different information. Passing one test does not automatically mean that all other VT characteristics are satisfactory.
5. Recommended VT Testing Sequence
A general VT commissioning sequence may be arranged as follows:
- Visual and mechanical inspection
- Nameplate verification
- Terminal identification
- Insulation resistance test
- Winding resistance test
- Ratio test
- Polarity test
- Burden measurement
- Secondary circuit verification
- Final restoration and documentation
The actual sequence depends on the VT design, test equipment and approved commissioning procedure.
For three-phase VT installations, verify each phase and each secondary winding as applicable.
6. Important Safety Precautions During VT Testing
Voltage transformer testing involves high-voltage hazards and potentially dangerous secondary circuit conditions.
The most important VT safety rule is:
Never short-circuit the secondary winding of an energized voltage transformer.
Unlike a CT, a VT behaves similarly to a conventional voltage source. A short circuit on its secondary can produce excessive current and damage the winding or connected equipment.
Always follow these precautions:
- Isolate the VT from all possible voltage sources.
- Apply Lockout/Tagout (LOTO).
- Verify the absence of voltage using an appropriately rated voltage detector.
- Discharge and earth the equipment as required by the approved procedure.
- Disconnect sensitive electronic equipment before insulation testing where required.
- Never short-circuit an energized VT secondary.
- Use correctly rated and calibrated test instruments.
- Confirm all terminal connections before applying test voltage.
- Maintain proper barriers and warning signs.
- Restore all secondary wiring, fuses and protection circuits before returning the VT to service.
Only qualified and authorized personnel should perform VT testing.
7. Applicable Standards for Voltage Transformer Testing
The following standards are relevant references for instrument and voltage transformer requirements.
| Standard | Application |
|---|---|
| IEC 61869-1 | General requirements for instrument transformers |
| IEC 61869-3 | Additional requirements for inductive voltage transformers |
| IEEE C57.13 | Requirements for instrument transformers |
| IEC 60255 Series | Measuring relays and protection equipment, where applicable |
Important: IEC 61869-3 specifically addresses inductive voltage transformers. Capacitive voltage transformers are covered by a different part of the IEC 61869 series.
For formal commissioning reports, identify the correct standard edition and the applicable clauses. The project specification and manufacturer’s instructions should also be followed.
Official references:
- IEC Webstore: https://webstore.iec.ch/
- IEEE Standards: https://standards.ieee.org/
- OMICRON: https://www.omicronenergy.com/
- Megger: https://www.megger.com/
8. VT Testing Report: What Should Be Included?
After completing VT testing, engineers should prepare a professional test report.
General Information
- Client Name
- Project Name
- Substation Name
- VT Location
- Manufacturer
- Serial Number
- Primary Voltage
- Secondary Voltage
- Accuracy Class
- Rated Burden
- Frequency
- Date of Testing
Test Result Information
| Test Name | Important Information to Record |
|---|---|
| IR Test | Test voltage, duration and measured resistance |
| Winding Resistance | Test current, measured resistance and temperature |
| Ratio Test | Nameplate ratio, measured ratio and ratio error |
| Polarity Test | Test method and polarity result |
| Burden Test | Secondary voltage, current, measured burden and power factor where applicable |
Example Professional Observation
Test: VT Ratio Test
Observation: The measured transformation ratio was recorded for the respective VT winding and compared with the nameplate ratio. The results should be evaluated against the applicable accuracy requirements and approved project acceptance criteria.
Avoid writing only “OK” or “Satisfactory” without recording the actual measured results.
9. Frequently Asked Questions (FAQ)
1. What is the purpose of VT testing?
VT testing verifies insulation condition, winding resistance, voltage ratio, polarity and secondary burden to ensure that the voltage transformer is suitable for its intended application.
2. What is the difference between VT and PT?
VT stands for Voltage Transformer, while PT stands for Potential Transformer. Both terms are commonly used to describe a voltage instrument transformer.
3. Why is the IR test performed on a VT?
The IR test evaluates insulation resistance between the primary winding, secondary winding and earth. It helps identify certain insulation problems.
4. What is the purpose of the VT ratio test?
The ratio test verifies whether the voltage transformation ratio matches the nameplate ratio.
5. Why is polarity testing important?
Correct polarity ensures the proper voltage relationship between primary and secondary terminals. It is important for protection, metering and synchronization applications.
6. What is VT burden in simple language?
VT burden is the total electrical load connected to the secondary winding, including meters, relays and secondary cables. It is normally expressed in VA.
7. Can a VT secondary be short-circuited?
No. An energized VT secondary must never be short-circuited because excessive current can flow and damage the equipment.
8. Which instrument is used for VT testing?
Common instruments include insulation resistance testers, winding resistance testers, ratio test sets, OMICRON CPC 100 and suitable digital multimeters.
9. Is a VT ratio test the same as a polarity test?
No. The ratio test verifies the magnitude of the voltage transformation ratio. The polarity test verifies the relative voltage relationship between the primary and secondary terminals.
10. Are these tests suitable for CVTs?
Not all procedures are directly applicable to Capacitive Voltage Transformers. CVTs require additional design-specific testing and manufacturer-approved procedures.
Conclusion
Voltage Transformer testing is an important part of electrical substation commissioning and maintenance.
For a new electrical engineer, understanding the purpose of each test is more important than simply operating the testing instrument.
- IR Test: Checks insulation condition.
- Winding Resistance Test: Measures winding DC resistance.
- Ratio Test: Verifies primary-to-secondary voltage ratio.
- Polarity Test: Verifies the correct relative voltage relationship.
- Burden Test: Checks the total secondary load.
A good VT testing engineer should understand the nameplate, terminal connections, test equipment, measurement results and applicable acceptance criteria.
Always follow the manufacturer’s recommendations, relevant IEC or IEEE standards and approved site safety procedures.
Disclaimer: This article is intended for educational purposes. Actual VT testing must be performed by qualified personnel using approved procedures and appropriately rated test equipment.
